Running any AI code assistant inside Docker
Quick setup
👉 See sections below for more details about this setup
Make sure docker is installed and set up your OpenCode config, e.g. as follows:
# create opencode config directories if not exist
mkdir -p ~/.config/opencode ~/.cache/opencode ~/.local/share/opencode
# The command below downloads my opencode.json
curl -o ~/.config/opencode/opencode.json https://aferro.dynu.net/llm_docker_sandbox/opencode.json
Then, add the contents of this llmsandbox launcher script to your environment (e.g. copypasting its content into ~/.bash_aliases).
This will define the llmsandbox command. We are now ready to go!
# Run the container, mounting project1 and project2 folders
# With -S, we are also mounting the opencode config folders, so our login and session is persistent
llmsandbox -O -S /path/to/project1 /path/to/project2

# optionally, also mount your conda environments with the -E flag:
llmsandbox -O -S -E ~/miniconda3/envs /path/to/project1 /path/to/project2

# we can then log into the running container from a different terminal:
docker exec -it opencode-ubuntu-sandbox bash
If you are logging in via OAuth for the first time, you may need to run auth login first:
llmsandbox -S  # start container with -S to store opencode config locally
opencode auth login  # inside the container, follow steps to login
Now you are logged in, and the credentials were stored locally via -S, so llmsandbox -O -S /path/to/project1 /path/to/project2 should now be authenticated.
The container also comes with conda installed, so the agent can also create+use environments (including your existing ones if mounted via -E).
Vibe coding: the good, the bad and the OpenCode + Docker way
Let’s say we want to use a state-of-the-art AI to assist us with coding. Said AI should be able to access and modify our filesystem, and we interact via some sort of chat. Many vendors provide solutions for this (Claude, Copilot, Codex or Mistral to name a few). Typically, we just need to install their corresponding tool/plugin and start cracking!
- Privacy: Typically, these systems have unlimited access to a bunch of files in your system, and these may get uploaded to the AI cloud, and maybe even used for training.
- Fragmentation: Often we also code on different machines, with different operating systems or editors, and we may use different vendors for different tasks, which may require different logins. Setting this up, especially if we care about privacy, can be a big headache.
This post provides one way to fix this. In a nutshell, the idea is to run OpenCode inside of a Docker image.
- Safety: The container only sees locations that you have explicitly mounted. We inherit safety from Docker.
- Simplicity: If you have Docker installed, just run the image and you are good to go! No need for plugins or text editors.
- Flexibility: This works on any system with Docker enabled. OpenCode supports virtually all vendors. Since this is terminal-based, does not depend on any particular text editor.
All of this while keeping a nice user experience: Both you and your AI assistant can access and modify the mounted files in parallel (with the text editor of your choice). The OpenCode interface is pretty smooth, and provides access to virtually every state-of-the-art AI assistant. Setup is very simple and flexible, and your opencode sessions and login credentials can be stored locally if you want. Your local conda environments can also be mounted and used by the assistant. As a teaser, this is how the end result looks like. If this seems interesting to you, keep reading!
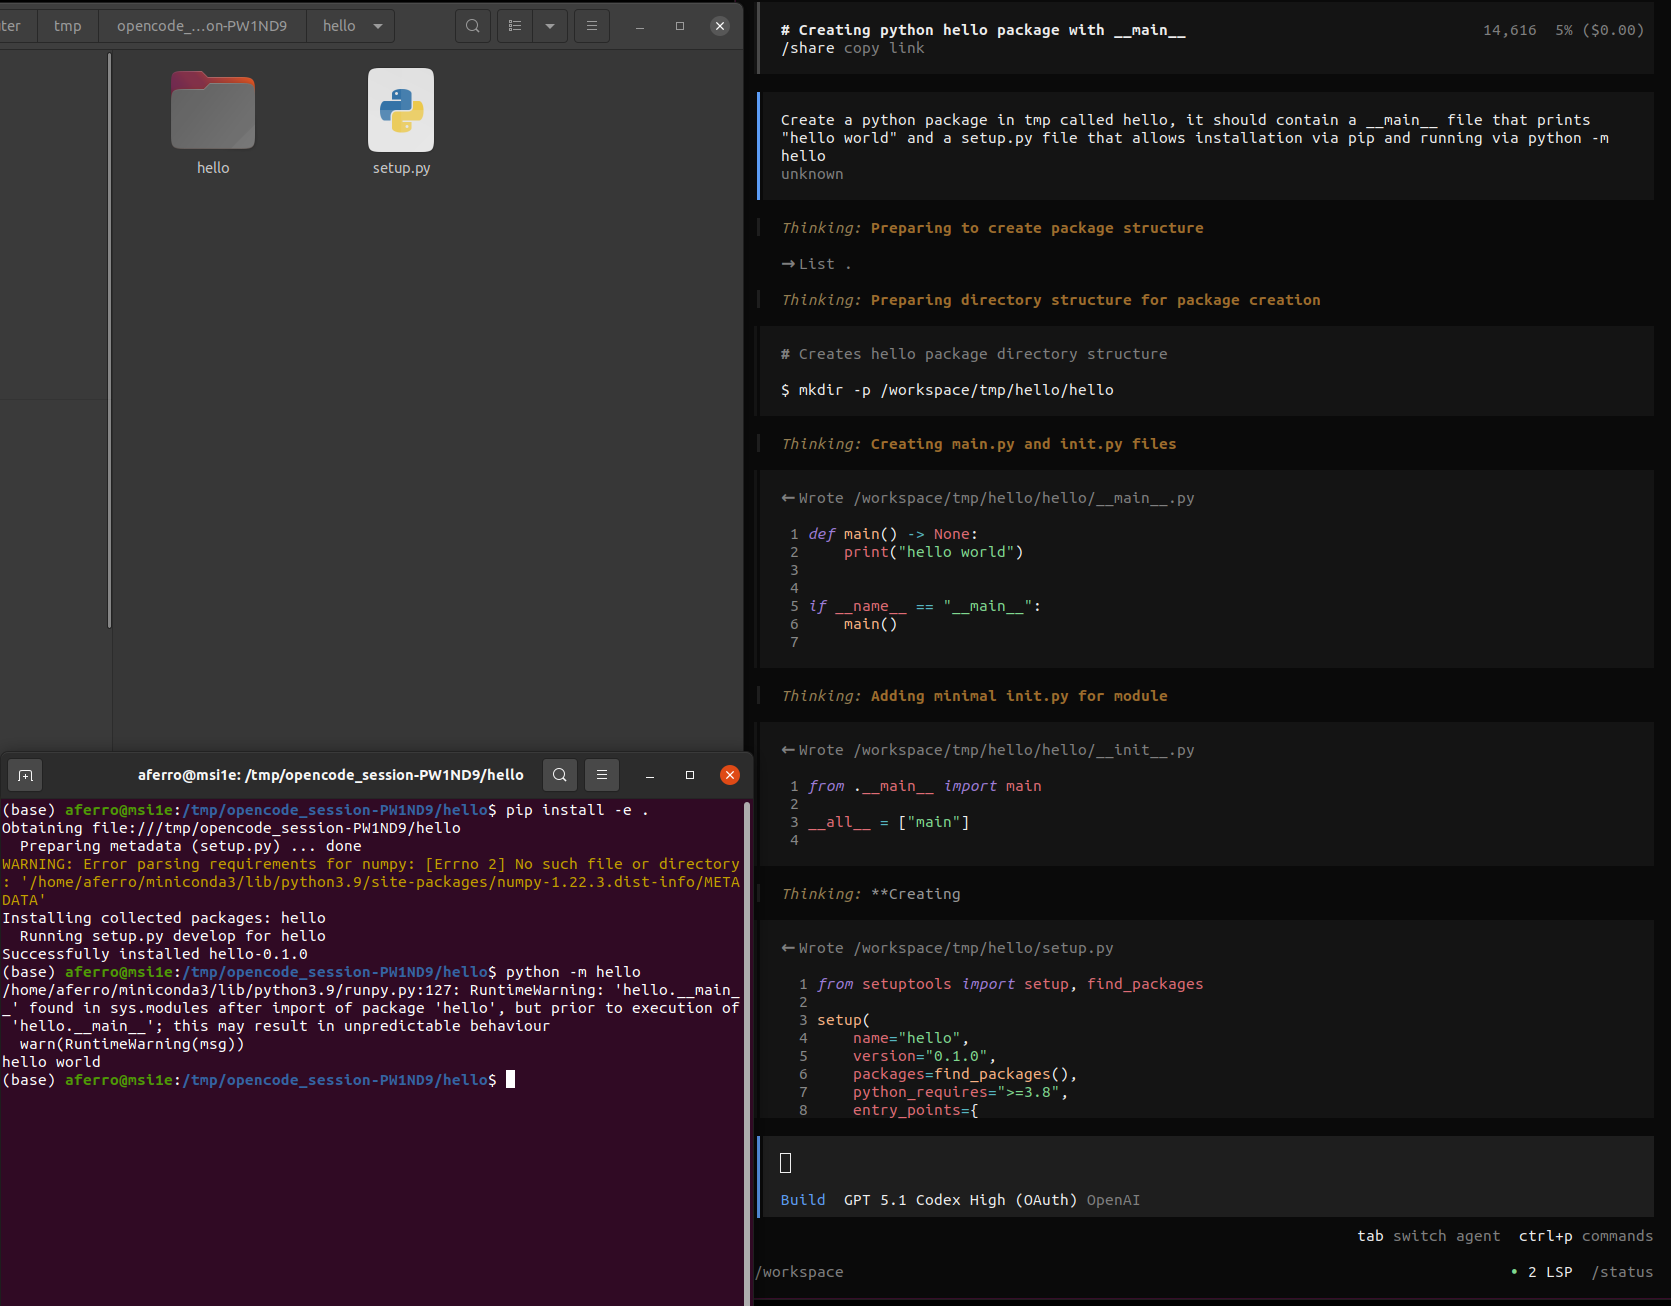
/tmp, which is mirrored to /tmp/opencode_sesion-PW1ND9 in our computer. On the top left we can see (and we could open our text editor to read, modify…) the files that were generated inside that location. On the bottom left we have installed and ran the python app. The whole thing took less than a minute.About OpenCode and Docker
OpenCode is an open source system to coordinate your AI code assistants. It provides support for most popular providers (such as Claude, Copilot and OpenAI) and types of agents (such as builder/planner), as well as a lot of convenient functionalities (such as saving sessions locally, dark mode, streamlining model permissions…). The interface is very neat and doesn’t depend on a text editor: a window opens, you chat with your agents, and you can open a menu to change configurations.
Since it is open source, OpenCode is highly configurable via a JSON file. This is the config that I am currently using, and here are more details about creating and adjusting your own config file.
Docker allows to create and run containers inside of your system, and it works on most popular platforms. Every container is a “virtual machine” that runs inside the “host machine”. The host can look inside the container, but programs running from the container generally cannot look outside. This is exactly what we want!
Containers are defined via a Dockerfile, which is a “recipe” of what commands you would run if you started installing things on a fresh computer.
For example, this is the Dockerfile that I have prepared to run OpenCode.
Running OpenCode inside a Docker container, we can achieve all our goals!
- Ability to work with all state-of-the-art AI assistants
- Works on any system with docker, and does not require a particular text editor
- Tight control over filesystem access without limiting the AI in unnecessary ways
- Nice user experience: we interact with the assistant via chat and files, sessions can be stored locally
And as you can see in the TLDR, setting this up is quite simple, and it boils down to simply running the Docker container and the launcher script I have prepared. Naturally, you may wonder what is inside the container and the launcher script. In the following section I’ll provide more details about the setup.
Setup details
👉 We assume the ability run Docker images inside your machine via the
dockercommand. To get started with Docker, see here.
In the quick setup, I recommend to prepare an OpenCode config and run a llmsandbox launcher script with the -S, -E and -O flags. Let’s unpack these steps.
At the core of the process is a Docker image that I have prepared and uploaded to DockerHub. This image grabs a fresh image with NodeJS installed (I picked the one with the least listed vulnerabilities as of December 2025). On top of that image, I installed Miniconda, OpenCode and other minimal dependencies.
Another feature of this image is a port-forwarding entry point, that re-routes all traffic inside the container from port 1456 to port 1455. This is needed to allow for OAuth login if using codex, since it is hardcoded to localhost:1455, and we cannot access that location from outside the container (see e.g. this issue for more details).
If you are not happy with this port forwarding and are using other vendors or don’t use OAuth, you can modify/remove it from the Dockerfile and build your own image via e.g.:
# run from the same location as the Dockerfile
docker build -t opencode-ubuntu-sandbox:codex .
Running the image without the llmsandbox launcher script is quite simple (it downloads the image the first time):
# create a tmp folder to share with the container
SESSION_DIR=$(mktemp -d /tmp/opencode_session-XXXXXX) && chmod 1777 "$SESSION_DIR"
# run container (downloads it the first time)
docker run --rm -it -p 1455:1456 \
  -v "$HOME/miniconda3/envs:/opt/miniconda/envs" \
  -v "$PWD/opencode_full_config.json:/workspace/opencode.json:ro" \
  -e OPENCODE_CONFIG=/workspace/opencode.json \
  -v "$SESSION_DIR:/tmp" \
  -v "$HOME/project1:/workspace/project1" \
  -v "$HOME/project2:/workspace/project2" \
  --name opencode-ubuntu-sandbox opencode-ubuntu-sandbox:conda_codex
That’s it! The terminal will then become what we call the container, awaiting your further instructions (the host is “your” machine, where you run docker run from). Here is an explanation of what’s going on:
- The
SESSION_DIRline creates a temporary folder with open permissions in the form/tmp/opencode_session-XXXXinside your host. Inside the container, this folder will be mounted as/tmp. Both you (the host) and the container can read, add, remove and modify files in that folder simultaneously, which is quite practical to see what’s going on and move files from/to the container. - In this case, we are also mounting the host folder
$HOME/opencode_workspaceinside the image. Similarly to before, both host and image can access and modify the contents of this folder. - Crucially no other host contents can be seen or modified by the image. So whatever you want your AI assistant to see, needs to be explicitly mounted via
-vflags! - The
/path/to/opencode_full_config.jsonis a JSON file such as this one that contains the OpenCode configuration. You can adjust it to your preferences, and it will be used by OpenCode inside the container. More info about the config here. - The
-p 1455:1456port forwarding is needed to perform browser authentication if you are using the Codex assistant from OpenAI. It is not needed otherwise.
Then, inside the container, one can simply run opencode to start the session.
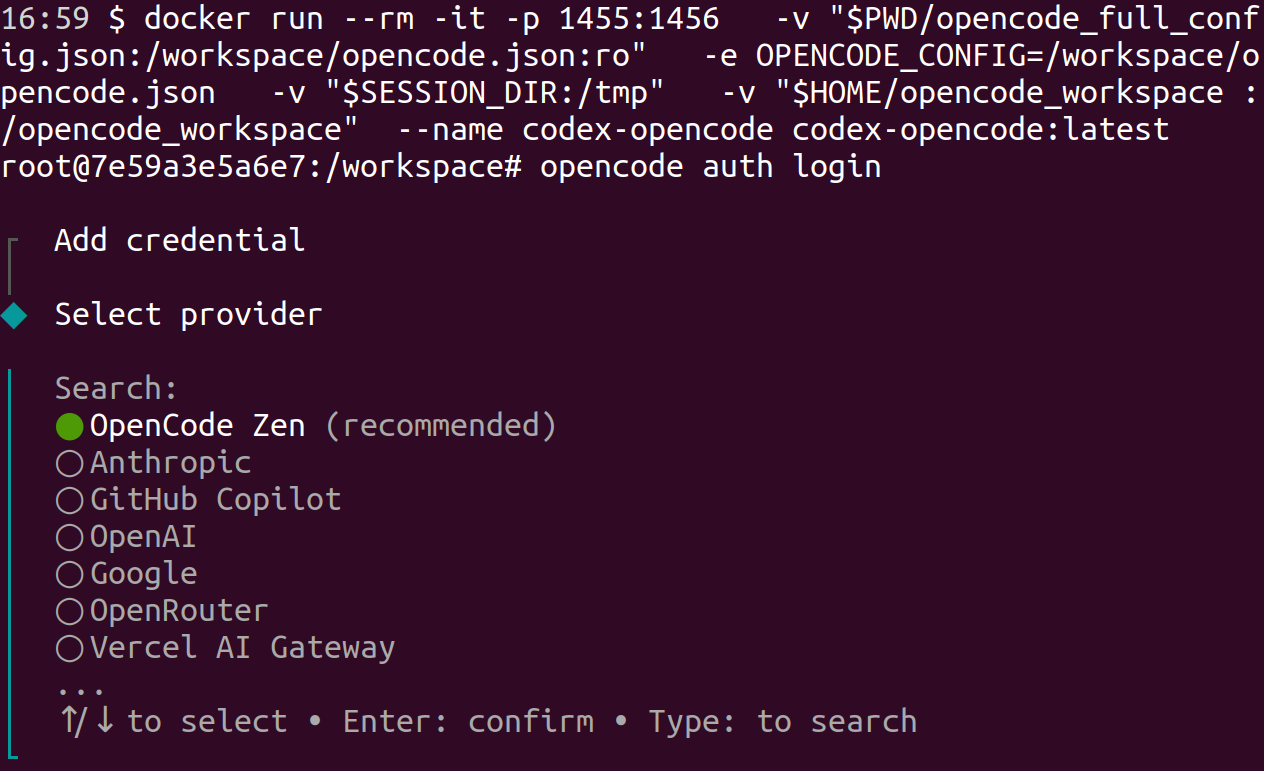
If you have a subscription that requires login, in particular Codex, running opencode auth login will display a link, that you can then open with the browser in your host, and authenticate via your preferred method. Since we did the port forwarding, opencode inside the container should be able to get the notification that you have successfully logged in.
Here is how the auth login looks like currently (the full list of supported vendors is much longer):
And some of the supported models:

Once you are set up, you can start chatting with your assistant! An example creating a "hello world" python app from a single prompt is shown above.
The llmsandbox launcher script is basically a convenience wrapper around this core functionality, with the following additions:
- A
-Sflag that, if provided, mounts the OpenCode persistent directories~/.config/opencode,~/.cache/opencode,~/.local/share/opencode. This is needed if you want to store your OpenCode sessions and login, because the container (with all its non-mounted contents) is destroyed every time you exit it (that’s the--rmflag)
- A
-E /path/to/conda/envsflag, that provides the path to your conda envs to be mounted into the image. Theconda_codeximage comes withcondapreinstalled, so any program inside the container, includingopencode, will be able to create and modify conda environments. If you mount your envs, they will also be accessible from the container.
- The
-Oflag: if provided, the container jumps directly inside ofopencode(typically the desired behaviour, unless you want to login or do some other task before runningopencode) - A
-C [PATH]flag to provide a custom path for theopencode.jsonconfig file (typically not needed if you use-S, because your config file will be already in some of the persistent directories)
As we can see, this setup is powerful, quite simple, provides strong control over filesystem access, and works on many systems and vendors independently of a text editor. Hope you enjoy it as much as I do, let’s bring that big Docker energy to your vibe coding setup! 🐳